Seriously, you do not have to be crafty to make this tomato cage ghost DIY a reality this Halloween. If you’re looking for a Pottery Barn alternative to spookify your porch or yard, you’ll love this super easy, adorable Halloween DIY that you can make a reality for under $15 and complete in a weekend.
Ladies, grab your hats and broomsticks.
Today, we are alchemizing and up cycling beach trash to treasure, decorating for Halloween, and, big bonus, saving money and the habitat our aquatic friends call the ocean.

This post may contain affiliate links. For more information, please see my disclosure page.
Okay, I don’t know who needs to hear this, but you do not have to break the bank to make your house look cute for Halloween. And you don’t have to be super crafty or Martha freaking Stewart, either.
Look, I used to think that the Holy Grail of Halloween was located at either Pottery Barn or Grandin Road, so I armed myself with store credit at both and charged like I was Joan of Arc.
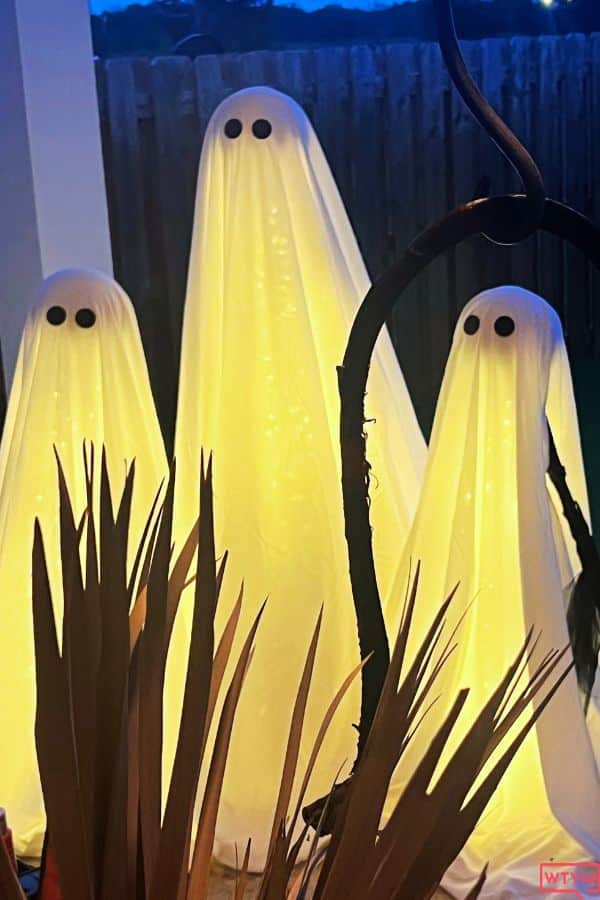
Both scenarios ended badly. Today, I will prevent that from happening to you by showing you how to DIY the ever-popular illuminated tomato cage ghosts for a fraction of the price.
Full disclosure, I go bat crap crazy for seasonal decorations – starting around Halloween. There is proof on this blog. Here, where I rounded up 100 painted pumpkin ideas, and here, when I went down the Dollar Store Halloween decor rabbit hole, oh, and also right here, as evidenced by 26 plus Halloween games for kids.
Some may call it enthusiasm, and some may put on their Judge Judy robe and call it a waste of resources, but do you know what it is?

It is freaking winning when you realize you can make it cuter than the catalog, for a fraction of the price. ( I mean, hello...Pottery Barn is getting $99 for two, before shipping. We made 3 for $15. Not 15 each – fifteen dollars for all three). To me, that spells liberation with a capital “L”.
Also, the fact that I get to “collaborate” with my son, Nathan, on these projects makes them more than just decorations. They are labors of love and joy, and physical representations of memories made. We have really enjoyed taking our time, gathering the supplies for this and several other projects from our local Habitat Restore, and a few freebies the tourists accidentally left on the beaches.
Na is my youngest child and he happens to have autism. And yes, I am 100% guilty of always trying to figure out how to help him out of his shell. I look at these DIYs as teaching opportunities that allow us to get out and meet people while doing something positive and fun. Also, it’s a great activity if you’re processing emotions from dealing with a narcissist or manipulator.
Back to the blog post.
While exploring the beaches of our new home here in Walton County, Florida, we’ve learned a lot about local and marine life and the dangers of plastics, starting with the balls we used for this project. (We found the one featured below on Inlet Beach, Florida). We’ve found a number of things out there, and that led me to research the impact of our trash and our friends in the water. Here’s what I learned. (Then I swear I’ll get to the ghosts!:)
4 to 12 million metric tons of plastic end up in the ocean each year? (That’s enough to cover every foot of coastline on planet Earth.)
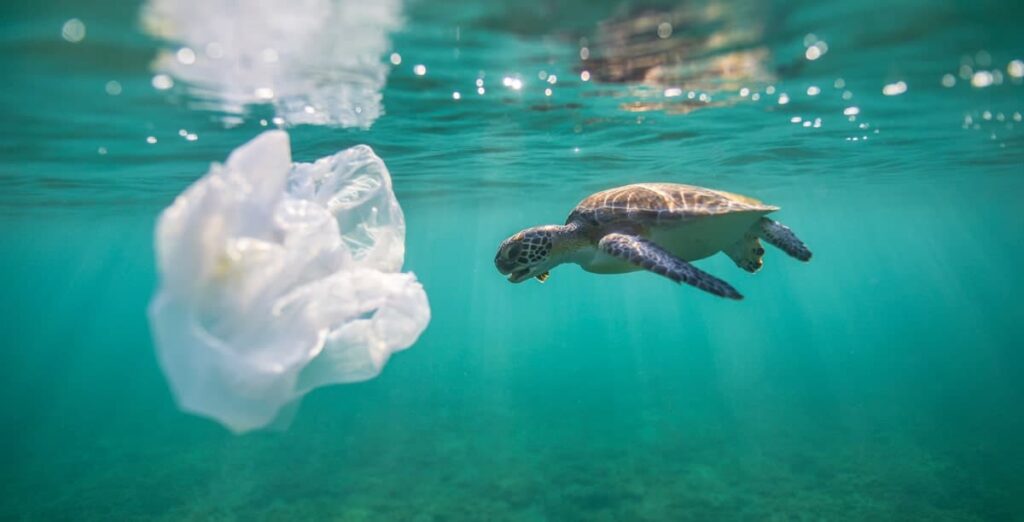
Plastic pollution impacts sea turtles, sea birds, fish, coral reefs, and countless other marine habitats and species. Plastic breaks down into smaller particles, known as microplastics.
Microplastics pass unchanged through waterways into the ocean. Aquatic life and birds can mistake microplastics for food, and if our fish and birds are being fed plastic, we have a severe food chain issue. 2015, the U.S. banned microbeads, but microplastics are still a huge problem.
You can help keep plastic out of the ocean. Remember: Reduce. Reuse. Recycle.
Okay, so now that my public service announcement is over, one of the things I love the most about this project is that you can let your imagination go wild and use anything – which I highly encourage.
And word of warning—once you allow the how do I DIY this myself bug into your brain, you won’t believe all the remarkable solutions you will conjure! It is magical.
What You Need To Make DIY Ghosts
3 tomato cages (3.5 feet each)
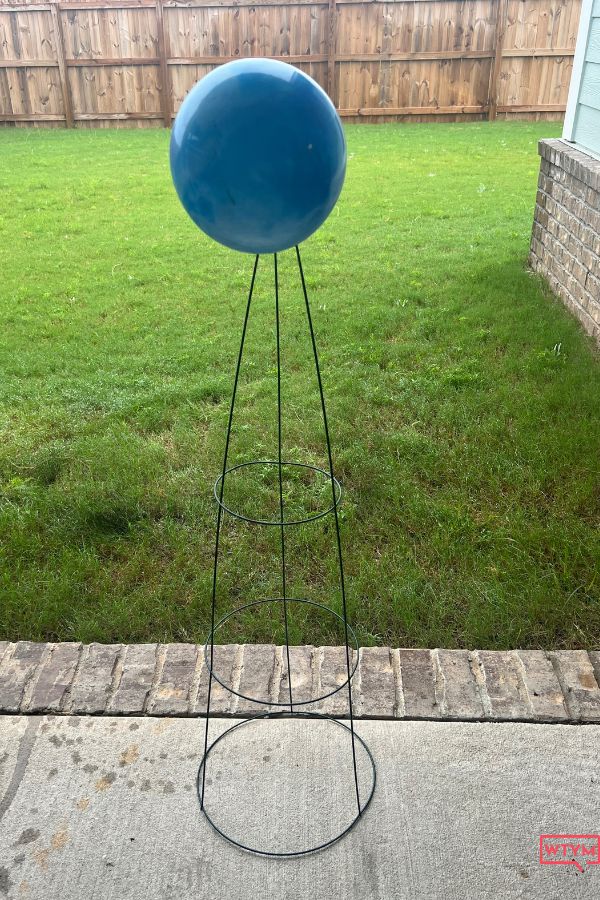
3 upcycled beach balls
White lights
White queen sheet
Eyes – Scotch Floor Protectors
Stakes – Only if you’re going to position the ghosts in your yard.
Tomato Cage Ghost DIY Step-By-Step Instructions
Carefully wrap the lights around the tomato cages. If you want to be extra, you can clip the lights to the tomato cage with floral wire, but trust me, that step is optional.
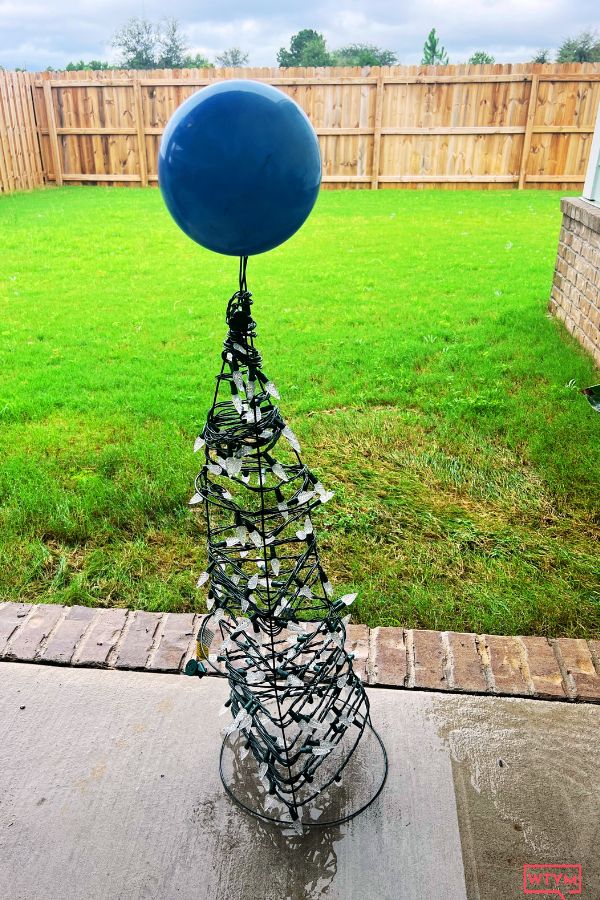
Make sure you position the lights with the correct electrical ending at the top of the cage. Put the receptacle end at the top so you can have your moment when it’s time to plug in and light up your creations. Otherwise, you will end up with an electrical nightmare that may cause you to become slightly agitated go bat crap crazy in front of people who don’t know you when you realize you have to re-string the lights. Not that that happened to me…🙂
Carefully impale your ball onto the top of the tomato cage. If you are up-cycling a beach ball, you will need to carefully bend back two of the ends of the tomato cage in order to properly affix the ball.
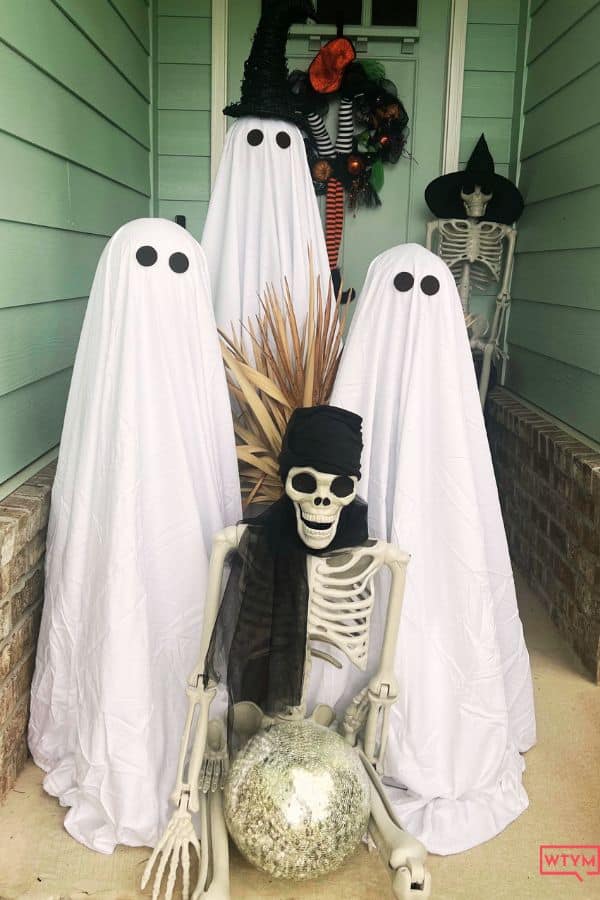
Cover with a white queen sheet.
Psst: According to Google, everyone is asking what size sheet do I use for a tomato cage ghost, which I highly doubt, but just in case – the answer is Queen.
Grab two Scotch Peel & Stick Floor Protectors (like this) and apply where the eyes go. Psst: Alternatively, you could cut the eyes out of black felt and hot glue them, or take a Sharpie and draw them on. I do not trust myself with this level of artistry, which is why I found the floor protector hack.:))
Repeat three times.
That’s it!
Substitutions (Or What If I Don’t Have A __?)
Here are a few ideas to stir up your creativity if you need more inspiration.
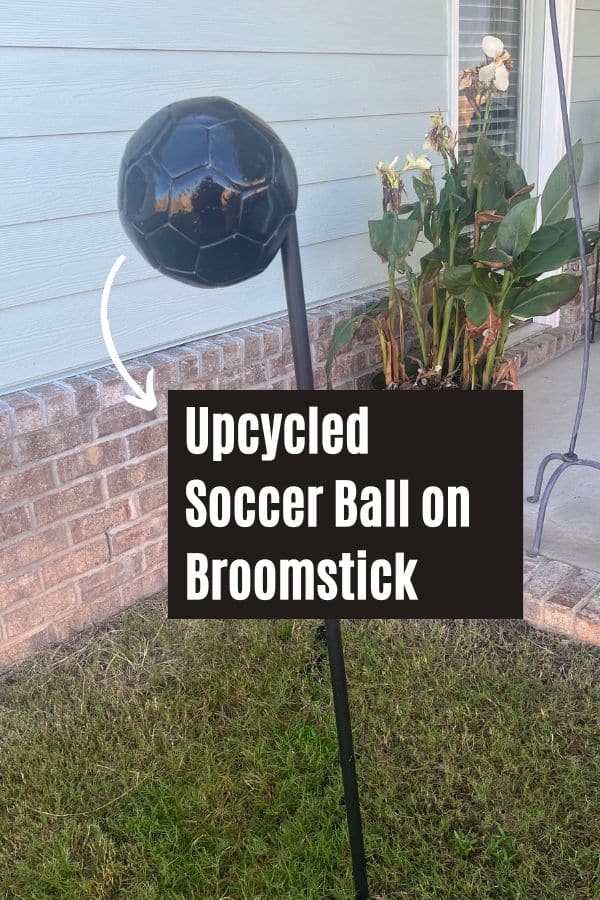
No tomato cage? Use chicken wire or a broomstick to make the ghost form.
Instead of beach balls, use an old soccer ball, basketball, Halloween bucket, or a 7-9 inch floral foam ball.
If you don’t have a white sheet to spare, you can use an old white tablecloth or a plastic tablecloth from the Dollar Store, upcycle a shower curtain or liner, or use an old dress. You could even layer white trash bags over clear industrial trash bags. The possibilities are endless!
Okay, I’ve got to go glitter some apothecary bottles and get started on the next Halloween project. I told you I have a problem – these DIY Halloween projects are addictive! I hope this has convinced you not to click BUY – and instead to DIY!
Will you please do me a favor? If you made it or tried it, please post a comment or a picture and show me how you spun it to make it your own!
Happy Halloween!
Don’t Miss these Halloween Favorites!
100 Brilliant No Carve Pumpkin Decorating Ideas Inspired By Pinterest
35 of the Best DIY Halloween Decorations-Fabulous & Frugal Decor Hacks
40 Stunning Dollar Store Halloween Decoration Ideas & Crafts
Healthy Pumpkin Bread Recipe
26 Halloween Games Kids Love
Please Share This DIY On Pinterest!